Battle of Waterloo 2020 Summer Wargame Replay
This Battle of Waterloo re-fight has used the original SPI blockbuster tabletop wargame 'Wellington's Victory'.
This game was played solitaire with no bias for any of the three armies involved. Although much of the original 'Wellington's Victory' rules are used, I mostly incorporated alternative 'House-Rules' that allow for historical representation and 'What-ifs' possibilities based on my broad knowledge of the campaign. Among the original official rules that were dispensed with; tedious troop-strength counters, cavalry shock-combat charging zones, infantry line/column formations, artillery ammo-supplies, and the combat results tables.
The TSR edition of the game's playing counters used were nearly all customized and modified in some way with some counter ideas borrowed from other boardgames such as GMT and Advanced Squad Leader, along with various community wargame-modders creations used too. I came up with some new counters as well, and even a few map corrections.
The game length : Forty 15-minute real-time turns; spanning the day of the June 18th, 1815, from 11.45 am to 9.30 pm.
On this introduction page I've itemized the game mechanics that were used in the replay. Links at the top and bottom of this page will take you to the first page of the replay fight.
> A more compact version of the 2020 Replay can be found over at this BLOG
> SEE THE FULL BATTLE ACTION REPORT > CLICK HERE
waterloo-napoleon.com ©
TO BECOME A SUBSCRIPTION MEMBER CLICK THE FOLLOWING;
Introduction
Basic Battle Objectives
Simple objectives are used to define victories in this solitaire replay game.
The French army's main goal is to destroy Wellington's army, and/or exit a considerable number of French troops off the north map edge via the Brussel's highway hex. In this goal, anything the arriving Prussian army may gain is moot and nullified - without Wellington's army to coordinate with, Blucher have to turn away in full retreat in order to escape a likely pincer movement by Grouchy's right wing coming from the Wavre area.
Wellington's goal is simply two-fold; first, hold onto the two main summits to allow for the Prussians arrival and thereafter jointly attack and destroy Napoleon; secondly, prevent Napoleon from exiting off the north map-edge's Brussels road hex since such a development would compel Wellington to decide to fully retreat in order to save and later evacuate the British elements of his army via Belgian sea-ports.
The Prussians goal is simply to link up with Wellington and help destroying or completely routing or demoralizing Napoleon's army, and thus rendering useless the threat of Grouchy's nearby detachment of 33,000 troops. In this game's variants, the Prussian army has a wide array of battlefield arrival options. Variants include the historical arrival time of Bulow's IV corps, or an earlier or very late arrival. Suspense of the arrival time is made an hour after the battle. Furthermore, there are two options for the main arrival area; one is directly towards Wellington's Army's Left flank instead of the historically riskier decision made to arrive south towards the French rear - which could have proved disastrous. Historically the latter move was a decisive success as it compelled Napoleon to divert nearly a quarter of his army to oppose Bulow's flanking attack.
Battle Fatigue, Command and Control, Army Demoralization
Battle fatigue is built into the House-game rules using a system to limit the number of units that can move in each army. During a real major Napoleonic battle not every single unit in an army will all move at once, nor can all fire all the time. Thus, in our rules, each army has unique restrictions to reflect historical accuracy of fire/movement capability; The corresponding foundation our replay uses:
1) the French army's strategic approach of chess-moving its various Corps attacks one at a time allows many units to move in a turn - but not all.
2) The Allied army's locked-in position status in defensive mode limits the numbers of units that can move each turn.
3) The Prussian army's historical and epic long march into battle; overcoming miles of in boggy terrain to nevertheless drive forward - fighting ferociously once in action and for hours thereafter upon arrival at the battlefield.
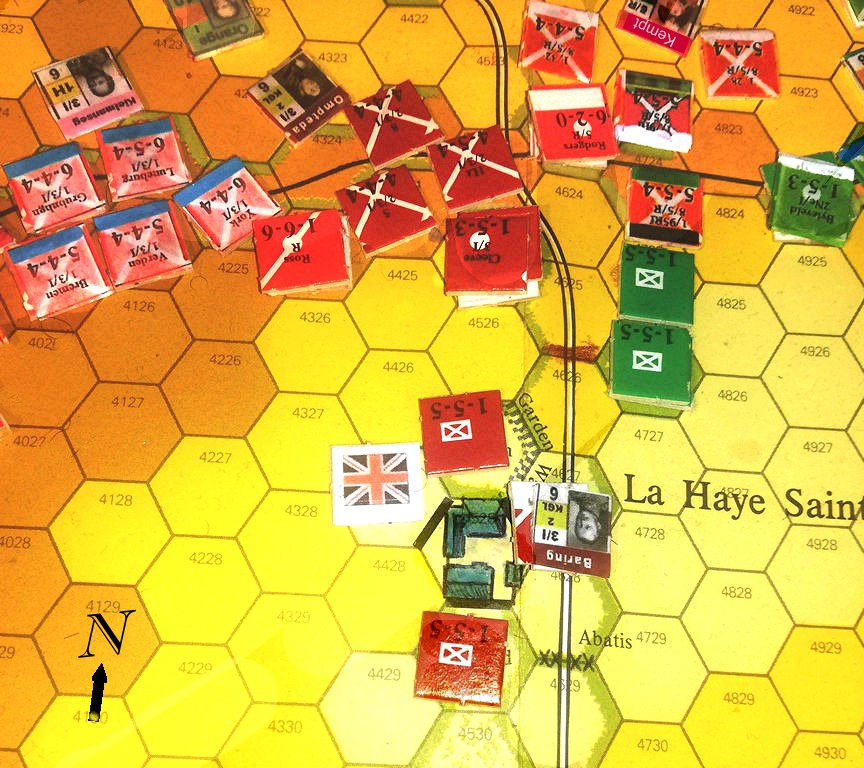
The Commander units are customized - like many of the combat units; borrowing and altering / customizing designs from various other Waterloo games and modified counters made available online by other boardgame hobbyists. Most of the commander counters of all the armies in the battle have on them, printed miniatures of original antique portraits of those commanders. Typical command and control variants apply as used in most wargames. Some historical traits of commanders are used - ie, counters depicting Major Baring and Lt.Col MacDonnell affect the garrison units in their respective fortress hexes of La Haye Sainte and Hougoumont. ADC's such as Delancey, La Bedoyere, and Heymes are present with unique abilities as are commanders such as Ney, Cambronne, Perponcher, Muffling - and Surgeon Larrey is represented with a battlefield ability! While Napoleon remains mostly static at centralized HQ posts Rossomme at the start and later around La Belle Alliance, Wellington and the Prince of Orange have special flexibility for moving to wherever they are needed during the battle. Blucher gives a special 'Vorwärts' movement bonus to nearby Prussian units.
Army demoralization rules from the original game are used in a modified variation; significant rating modifiers are associated with capture and losses of strategic map objectives such as fortresses and specific villages - in our game the capture of hills such as Mont St.Jean and Ohain Ridge are also objectives.
Combat and Movement
- I've overhauled the game's combat and movement rules significantly. Movement of units in the game's 15 minute turns has been more realistically increased. A special rule allows for British cavalry movement to be exceptionally extensive in rare possibilities of a new 'glory-charging' rule which is destructive but perilous for the attacker units too. Artillery batteries can all move while limbered in any numbers per army during each turn. Infantry and Cavalry units are limited in the numbers they can move by the army characteristic restrictions mentioned earlier. Contrasting the official game's flood of skirmisger counters that could be used in play, our version has a small limited number of infantry and cavalry skirmishers that are active in the battle. Infantry fire is realistically confined to point blank range (40 yards / adjacent hex) - the 2 hex maximum range is omitted, except for Rifle units.
The French 'Grand Battery' has random targeting in its extensive firezone which includes hidden-target effect capability.
Other tweaks include:
- Units lose their ability to freely fire and move while under the effects of being disrupted and routed.
- Owning a fortress can inflict abstract combat bonus effects against nearby enemy units that are in open ground hexes each game turn.
- Unit casualties are performed as 'step losses' of counters - the tedious process of using troop strength-loss counters are omitted.
The battlefield at 11.45 am, prior to opening action.
Napoleon's French Army of the North prepares to attack Wellington's army. Will history repeat itself?
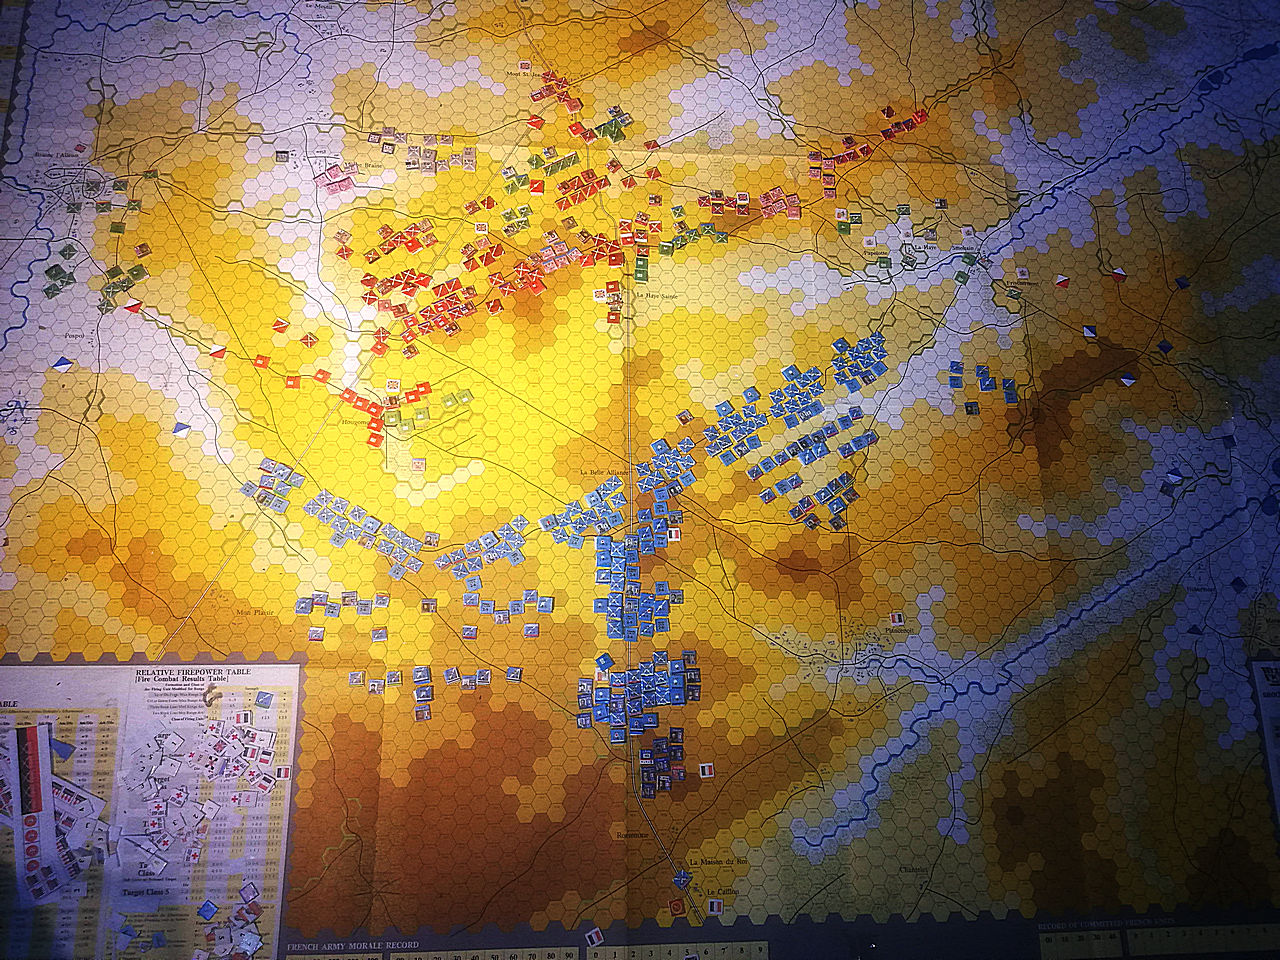
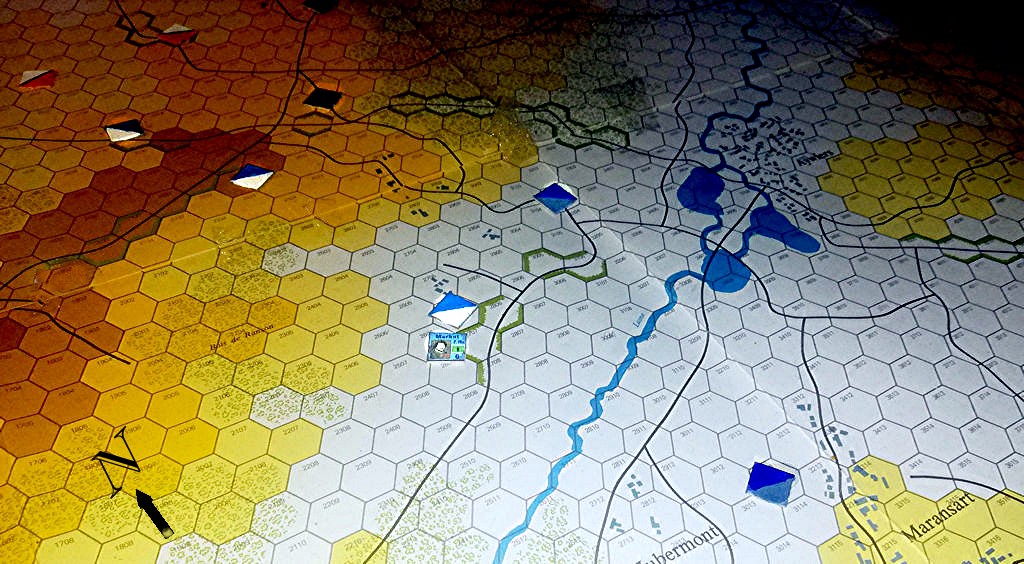
The game uses four 22"x34" maps joined together to recreate the battlefield along a six mile front from Braine L'Alleud in the west to Lasne in the east.
The game's hex-scale system is set at 100 yards wide per hex. Overall, the terrain of the battlefield is very accurately depicted.
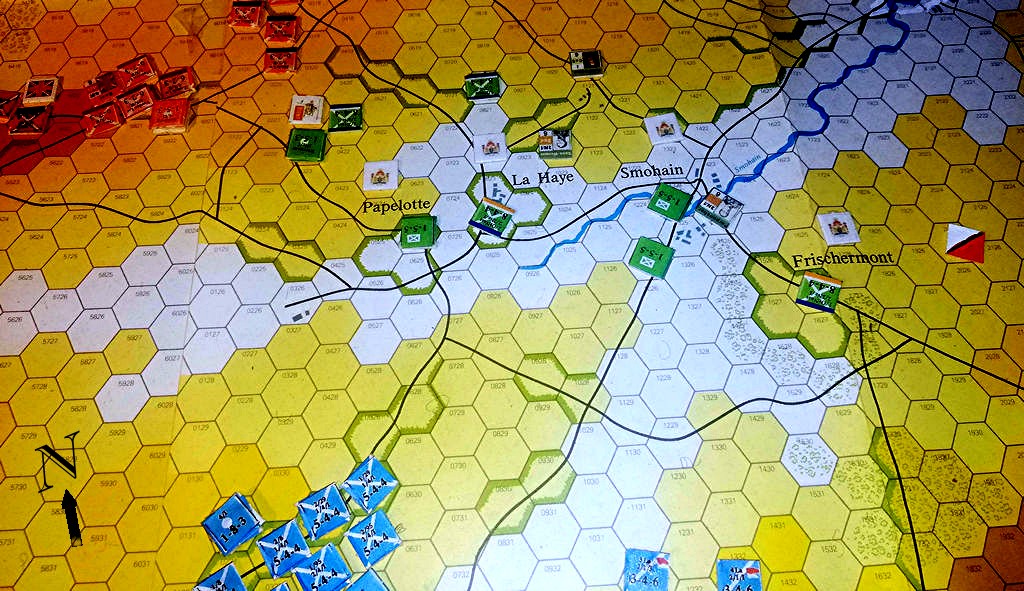
La Haye Sainte farmhouse prior to the battle start; I redid the art for the farmhouse hex depiction. My customized Major Baring commander counter is on the road - inspecting the defences one final time. The map design is astoundingly accurate - no Waterloo wargame since has been made better with topography details. Only a few other tweaks were made - such as erasing the game's 'Great Orchard' title in the Hougoumont area which was erroneously put in the main woods area by mistake.
I also corrected the strange double bridge put on the Smohain Brook near Ohain. Lastly, I added fortress walls to two sides of the Plancenoit Church hex to make it a key defensive feature if needed, as it was in the real battle.
The important position on the Allied Left Wing made up of the Nassau Brigade commanded by the young stand-in General Saxe-Weimar, occupying varied settlements in the area. One of his battalions had been sent to Hougoumont on the right flank just before the battle started. The famous Scots Grey account of Corporal Dickson mentioned seeing them strutting with pride as they marched along the army center.
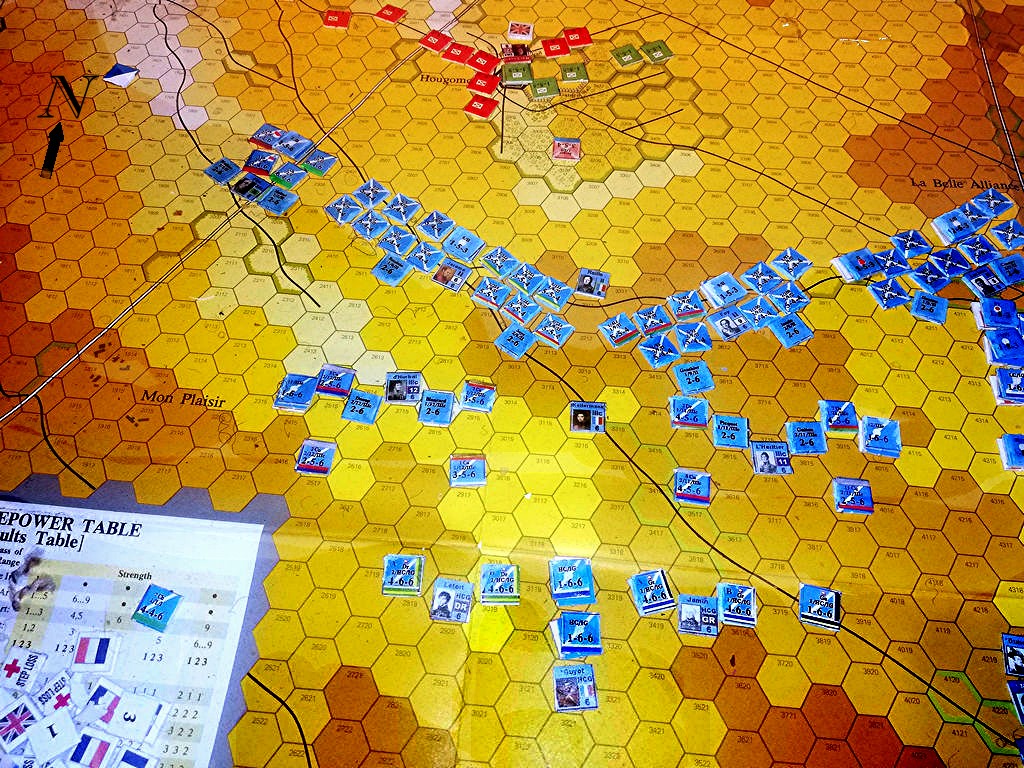
The French army's Left Flank facing the Allied army's forward post at Hougoumont. General Reille's Corps formed the forward line, and Kellermann's Cavalry Corps composed the second line. Guyot's Imperial Guard Heavy Cavalry is in the reserve line; I tweaked the two cavalry regiments' counters in this division; splitting the enormous sized regiments of the Empress Dragoons and the Horse Grenadiers into two squadron counters each in place of their original single game counters. Thus the two squadrons could act as one stack or split into two smaller forces. This tweak worked VERY well in the game.
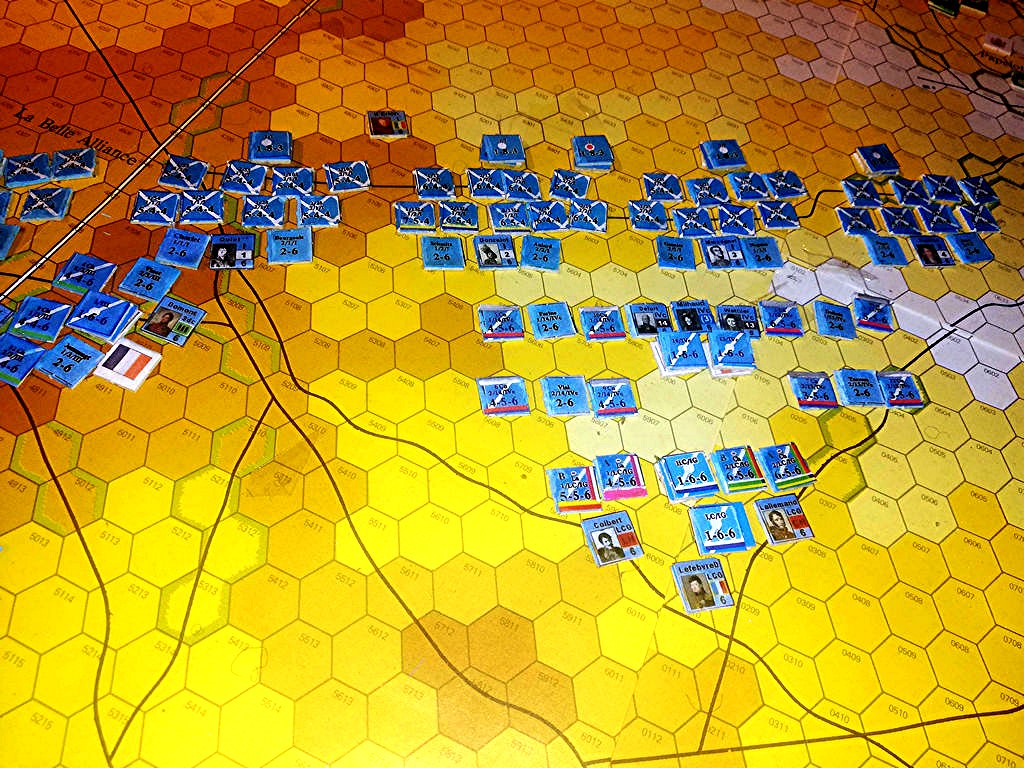
The French army's Right Flank facing the Allied army's positions north on the Ohain ridge and the La Haye Sainte farmhouse. Along the very top of the photo, the French Grand Battery position will be put in motion to set up shortly after the battle starts, along what is known as the intermediate ridge which runs between La Haye Sainte and La Belle Alliance Inn. Behind D'Erlon's I Corps infantry divisions at the top is Milhaud's IV Cavalry Corps, and south of them are the counters of the Guard Division of Light Cavalry's two regiments. I customized the game's version of these very big-sized regiments by splitting each of them into two pretty-looking counter squadrons. The Guard Lancers having a red/yellow Dutch Lancer squadron, and a Polish squadron with crimson-pink/white colourings.
(Right) At the picture top is the immense Paris Woods located to the east of the French army's vulnerable Right Flank - protected by Lobau's weak VI Corps.
Historically the woods provided a screen for the arrival of the Prussians IV Corps arrival. There is a Marbot commander counter on the map. His French 7th Hussars unit was sent to scout the arriving Prussians and it operated with no direct activity in the main battle area. He's represented on the map as a decorative leader counter along with some cavalry skirmishers - which I have for operating on the battlefield flanks for each army; they have no actual combat capability. Primarily, they're used for creating an extended chain that rebuffs enemy skirmishers from moving through those screens of properly interlinked skirmish lines.
Note* Marbot's interesting -if not 'embellished'
Battle of Eylau personal story
is retold in the site's membership area.
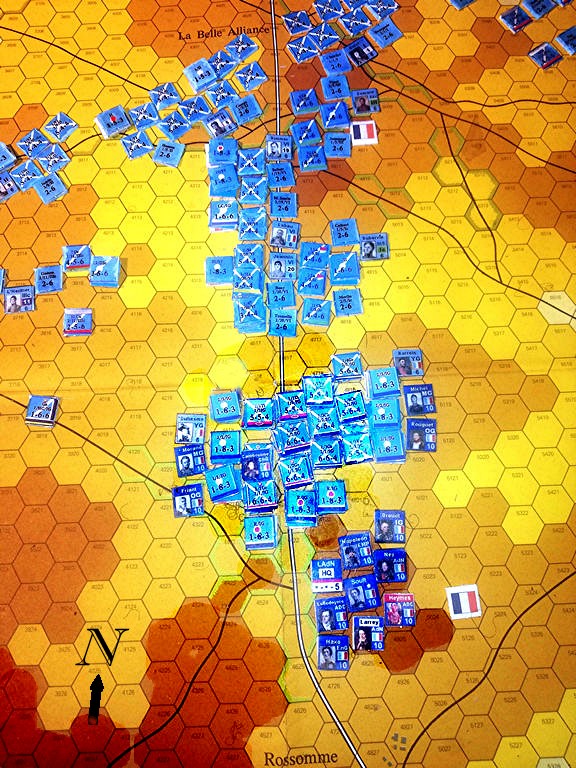
The French central infantry reserves and Imperial Foot Guard at the battle start to the north of Napoleon and his staff who are gathered on the Rossomme Heights in the lower right corner.
The events of the Battle of Waterloo fought on Sunday, June 18th, 1815, have been researched and described in great depth for the past 205 years. I've incorporated much in the way of hindsight as is typical with most Battle of Waterloo wargames - the number of what-if's surrounding this battle and the campaign are immense and too important to omit.
I've locked in certain characteristics of the battle to keep the playing authentic. Examples of these 'House-Rules' incorporations are;
1) Keeping the French army's Lobau's VI Corps from rushing off to the eastern edge of the map before anyone knows the Prussians are expected there.
2) Allowing the recreation of a French Grand Battery position which has the capability of using 'area targeting' of Wellington's Allied army even though it is mostly hidden by the summits of Mont St.Jean and the Ohain ridge, out of direct French firing view from their own starting frontline of hilltops.
3) Wellington's army MUST KEEP a significant presence of his forces kept on Mont St.Jean and Ohain Ridge hilltops, otherwise such absences could cancel the arrival of the anticipated Prussian reinforcements - the idea being that the Prussians will fear Wellington has retreated and are thus too late to join the battle;
ie, In hypothetical terms, Prussian scout patrols monitoring the abandonment of those summits would rush back to the Prussian General staff declaring Wellington was in full retreat and thus evading a fight with the French, contrary to the agreement with Blucher to hold on so that they could link-up and overwhelm Napoleon. Historically, this happened just when the Prussian I Corps arrived on the evening of battle. A false report almost sent the Prussian force away from directly helping Wellington's crumbling frontline. The mistake was acted upon just in time to redirect the I Corps back on course to save Wellington's fortunes.
Full Replay Report in the site's membership area only
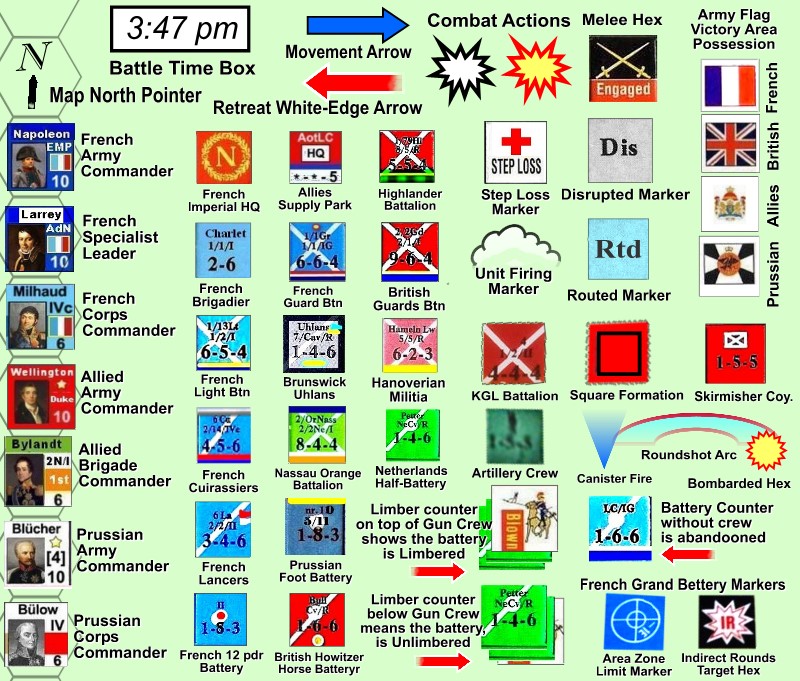
Game Counters
It took a while, but I made a very satisfactory effort in customizing much of the game's counters. Whereas the original 1976 SPI and TSR 1983 versions of Wellington's Victory had decent-looking standard playing pieces, the subsequent edition had awful barely legible French and Prussian combat counters.
My tweaks included;
a) Adding colours to combat counters in many cases that identified units by regiments and brigades. I also jazzed up the colours on the Guards units in each army.
b) I borrowed counters from other games, including Advanced Squad Leader (infused into my House-Rules for 'French Grand Battery' Indirect Area fire bombardment), and GMT's 'Battles of Waterloo' counters by RODGER B.MACGOWEN (for support counters such as battery-limber status, victory position markers, fired cannons).
c) I created new leader counters using portraits of commanders. I got 95% of all Wellington's army commanders from Brigade level and-up. I got all of Napoleon's army commanders from Division level and-up and created a dozen 'Special Rules' leader counters such as Cambronne, Baron Larrey, Ney's ADC Heymes :) I gotall of the Prussian leaders from Corps level and up. I based my Leader counter designs on existing customized Waterloo game leader counters of those created by MIKOLAJ LENCZEWSKI which he lovingly modded for the game 'Napoleon's Last Battles'.
Creating well-designed counters takes A LOT of effort and patience.
- SEE THE END OF THIS PAGE FOR A GOOD OVERVIEW OF THE COUNTERS.
The original game publication had several errors in the Orders of Battle for each army.
So, I ended up creating new counters and adjusting the strengths of others to match historical reality. The Netherlands contingent have several weak half-sized batteries. Overall, the Hanoverian Militia battalions are more battle-hardened. I got rid off 'extended line counters' except for use with the few British battalions numbering 800 men and higher. Simple 'STEP-LOSS' counters replace the game's over-ambitious 'strength counters' system. Non-combat scouts are added in a limited role. Skirmishers are still used but ONLY limited to those that start the game as such on the Allied side at Hougoumont, La Haye Sainte, and Saxe-Weimar's outposts; otherwise, skirmishers are an abstract feature of the game - it is assumed clouds of French skirmisher snipers are all across the frontline, HIGHLY annoying the Allies but not actually causing excessive losses. Saxe-Weimar's Brigade is more accurately depicted and deployed. British Highlander units have Plaid colour stripes - and yes, each battalion with its correct plaid colours :)
I made the British batteries of Mercer, Bull, and Whinyates distinguished for special rules they're each allotted. On the French side, the four immense Imperial Guard cavalry regiments are each split into two squadron counters. Napoleon's Old and Middle Guard infantry are distinguished. The destructive French 12-pdr batteries have an ominous red dot on their counters. French Cuirassiers and Carabinier regiments have a strip of silver and brass colour, respectively, topping their counters. Some new Prussian combat units were added; others not in the battle were removed. Colourful Lancer penant designs are on every Lancer and Uhlan regiment in the game.


Watch the replay on Youtube
<< See replay battle images Gallery

Imperial Guard cavalry regiments 'A' Squadrons ( Each representing half a regiment in the game )
Colonel Heymes - Marshal Ney's ADC.
( This counter has limited commander abilities )
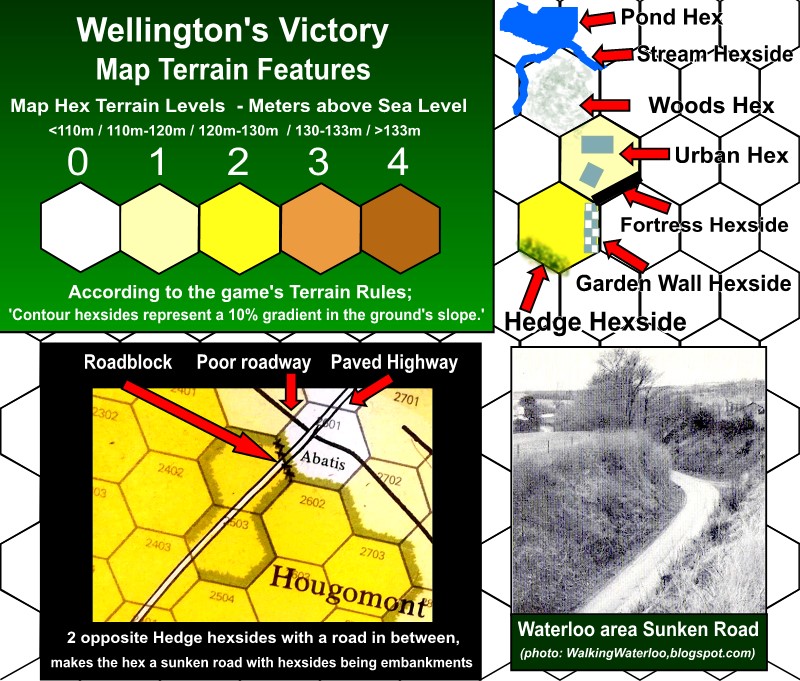
Map Terrain Symbols
Game Counters


